Scanner / Optical Scanner
A scanner is an input device for computer. It can scan any printed document with text as well as images. It will :- Read any printed paper or picture,
- Convert text or images into digital form
- Saves this converted digital file into computer storage for later use
Uses Of Optical Scanners
You can scan your documents or pictures to:- Store into computer memory.
- To save lot of effort and time because if you type the whole text on printed page, it will take effort as well as time).
- Show image or text on computer screen or on a multimedia projector's screen.
- In addition, you can send this scanned document or image to your friends all over the world with the help of Internet & Email.
- You can publish the scanned documents or images on your website or blog.
- You can apply online and send the scanned images of your academic documents in any part of the world within minutes.
- If your scanner supports OCR - Optical Character Recognition, you can scan a page with printed text and save it in an editable computer file. You can change or add more contents in this scanned file.
Types Of Optical Scanners
There are different types of scanners:1. Flat Bed Scanner

A flatbed scanner is the most common type of optical scanners used to scan printed text and images and save into computer storage as a digital file. It works on the principle of a photo copier machine. We pickup the cover of the scanner and place the printed page on the glass surface of the scanner. Now we will instruct scanner through computer software to start scanning. The scanner will scan with the help of light and save the digital file into computer storage. If you have an OCR scanner, you can save your text into editable form. This will save a lot of hard work and time to enter text by keyboard too. It is widely used in offices, schools, colleges, universities and homes for common scanning needs. If a book is very rare or difficult to find, we can scan its all pages one by one. Later on we can take prints of these scanned pages through a color printer.
2. Sheet Fed Scanner
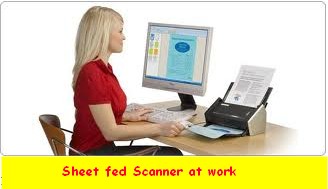
A sheet fed scanner works like a fax machine mechanism. In a sheet fed scanner, pages are entered into scanner like a fax machine.
Advantages of Sheet Fed Scanner
- A feet shed scanner is relatively smaller in size.
- It is more portable.
- It takes less space.
Disadvantages Of Sheet Fed Scanner
- It requires separate pages to scan. But, it cannot scan a book because of its binding.
- It can scan normal papers with normal thickness only.
3. Hand Held Scanner

Hand Held scanner is a small, light weight scanner and portable scanner. It is used to scan small amount of data like short articles from news papers. It is held in hand and is moved over the text page or image slowly and smoothly from start to end. Its scan quality may be lower than flat bed or sheet fed scanner but it can used to capture small amounts of text or small images, quickly.
SkyPix Hand held Scanner

This is a portable, cordless hand held scanner that is used to scan and save important documents, letters, or pictures. It records scanned documents in its memory card. you can transfer these scanned documents on yor computer for later use. You can scan and save important news from the news papers or interesting articles from magazines.
4. Drum Scanners

Drum scanners are used by the Publishers to scan images with details. Drum scanners use photomultiplier tube technology. In drum scanners, the document to be scanned is mounted on a glass cylinder. At the center of the cylinder is a sensor that splits light bounced from the document into three beams. Each beam is sent through a color filter into a photomultiplier tube where the light is changed into an electrical signal. And in this way a complete image with immense details can be obtained. Drum scanners are widely used in publishing industry.
Comments